After that, I take water color pigment and add ox gall to it. The ox gall is the bile derived from the gallbladder of an ox and it does two things. The first is that it lowers the density of the water color, so that it more readily floats on the thickened water. The second is that it spreads the pigment out. If the ox gall is not added and you were to drop the pigment onto the water, it would stay the size of the drop, but when ox gall is added, the drop blooms, spreading the pigment into a circle over the water.
This kind of marbling is all about finding the right balance. Too much ox gall and the pigment will spread too thin, too much pigment, and it may not float atop the water. On top of that each pigment reacts differently to the ox gall, some may want more than others. If the water is too hot or too cold it will affect the viscosity. Needless to say, dialing everything in can be a bit of a dance. But once it’s set up, you can just play. Splattering different colors, watching them bloom, and swirling them around.
Once there is a pretty marbled pattern sitting atop the water, I take one of the treated pieces of paper, and delicately place it onto the design. Then I remove the paper and remove any residual viscous water, and set it out to dry. Thanks to the mordant, the pigment will cling to the paper, leaving behind a beautiful piece of marbled paper.
There are many rabbit holes to follow in booking, and paper marbling is one of my more recent favorites. I learned it in 2023 and have been incorporating it into my bindings ever since.
There are a number of different ways to marble paper. It’s all about suspending pigment on top of water so that it can be moved around. After a fair amount of reading, I gravitated to a traditional style that dates back a number of centuries. This style uses a difference in density between the pigment and the water.
To begin, I treat a few sheets of paper with a mordant solution of water and alum and let those sit while I prep everything else.
Next, the water is thickened using carrageenan. Getting the right viscosity and key, different designs of marbled paper also prefer different viscosities.
Techniques
-
Eco printing refers to the processes of using plants to make a print. There are a lot of types of eco printing. The simplest form is to take a flower and pound it with a hammer against a piece of fabric until it leaves a stain of the shape of the flower. The type I do is called Tannic-Iron eco printing. Tannic-iron refers to the reaction between the tannins in the plant and iron. When tannins and iron mix, they form a natural dye. This reaction can be found in ink making, wood working, and natural dying as well as other crafts!
-
-
“Embossing creates a raised design by pressing it upward from underneath the material, while debossing creates a recessed, sunken design by pressing down from above” – Google.
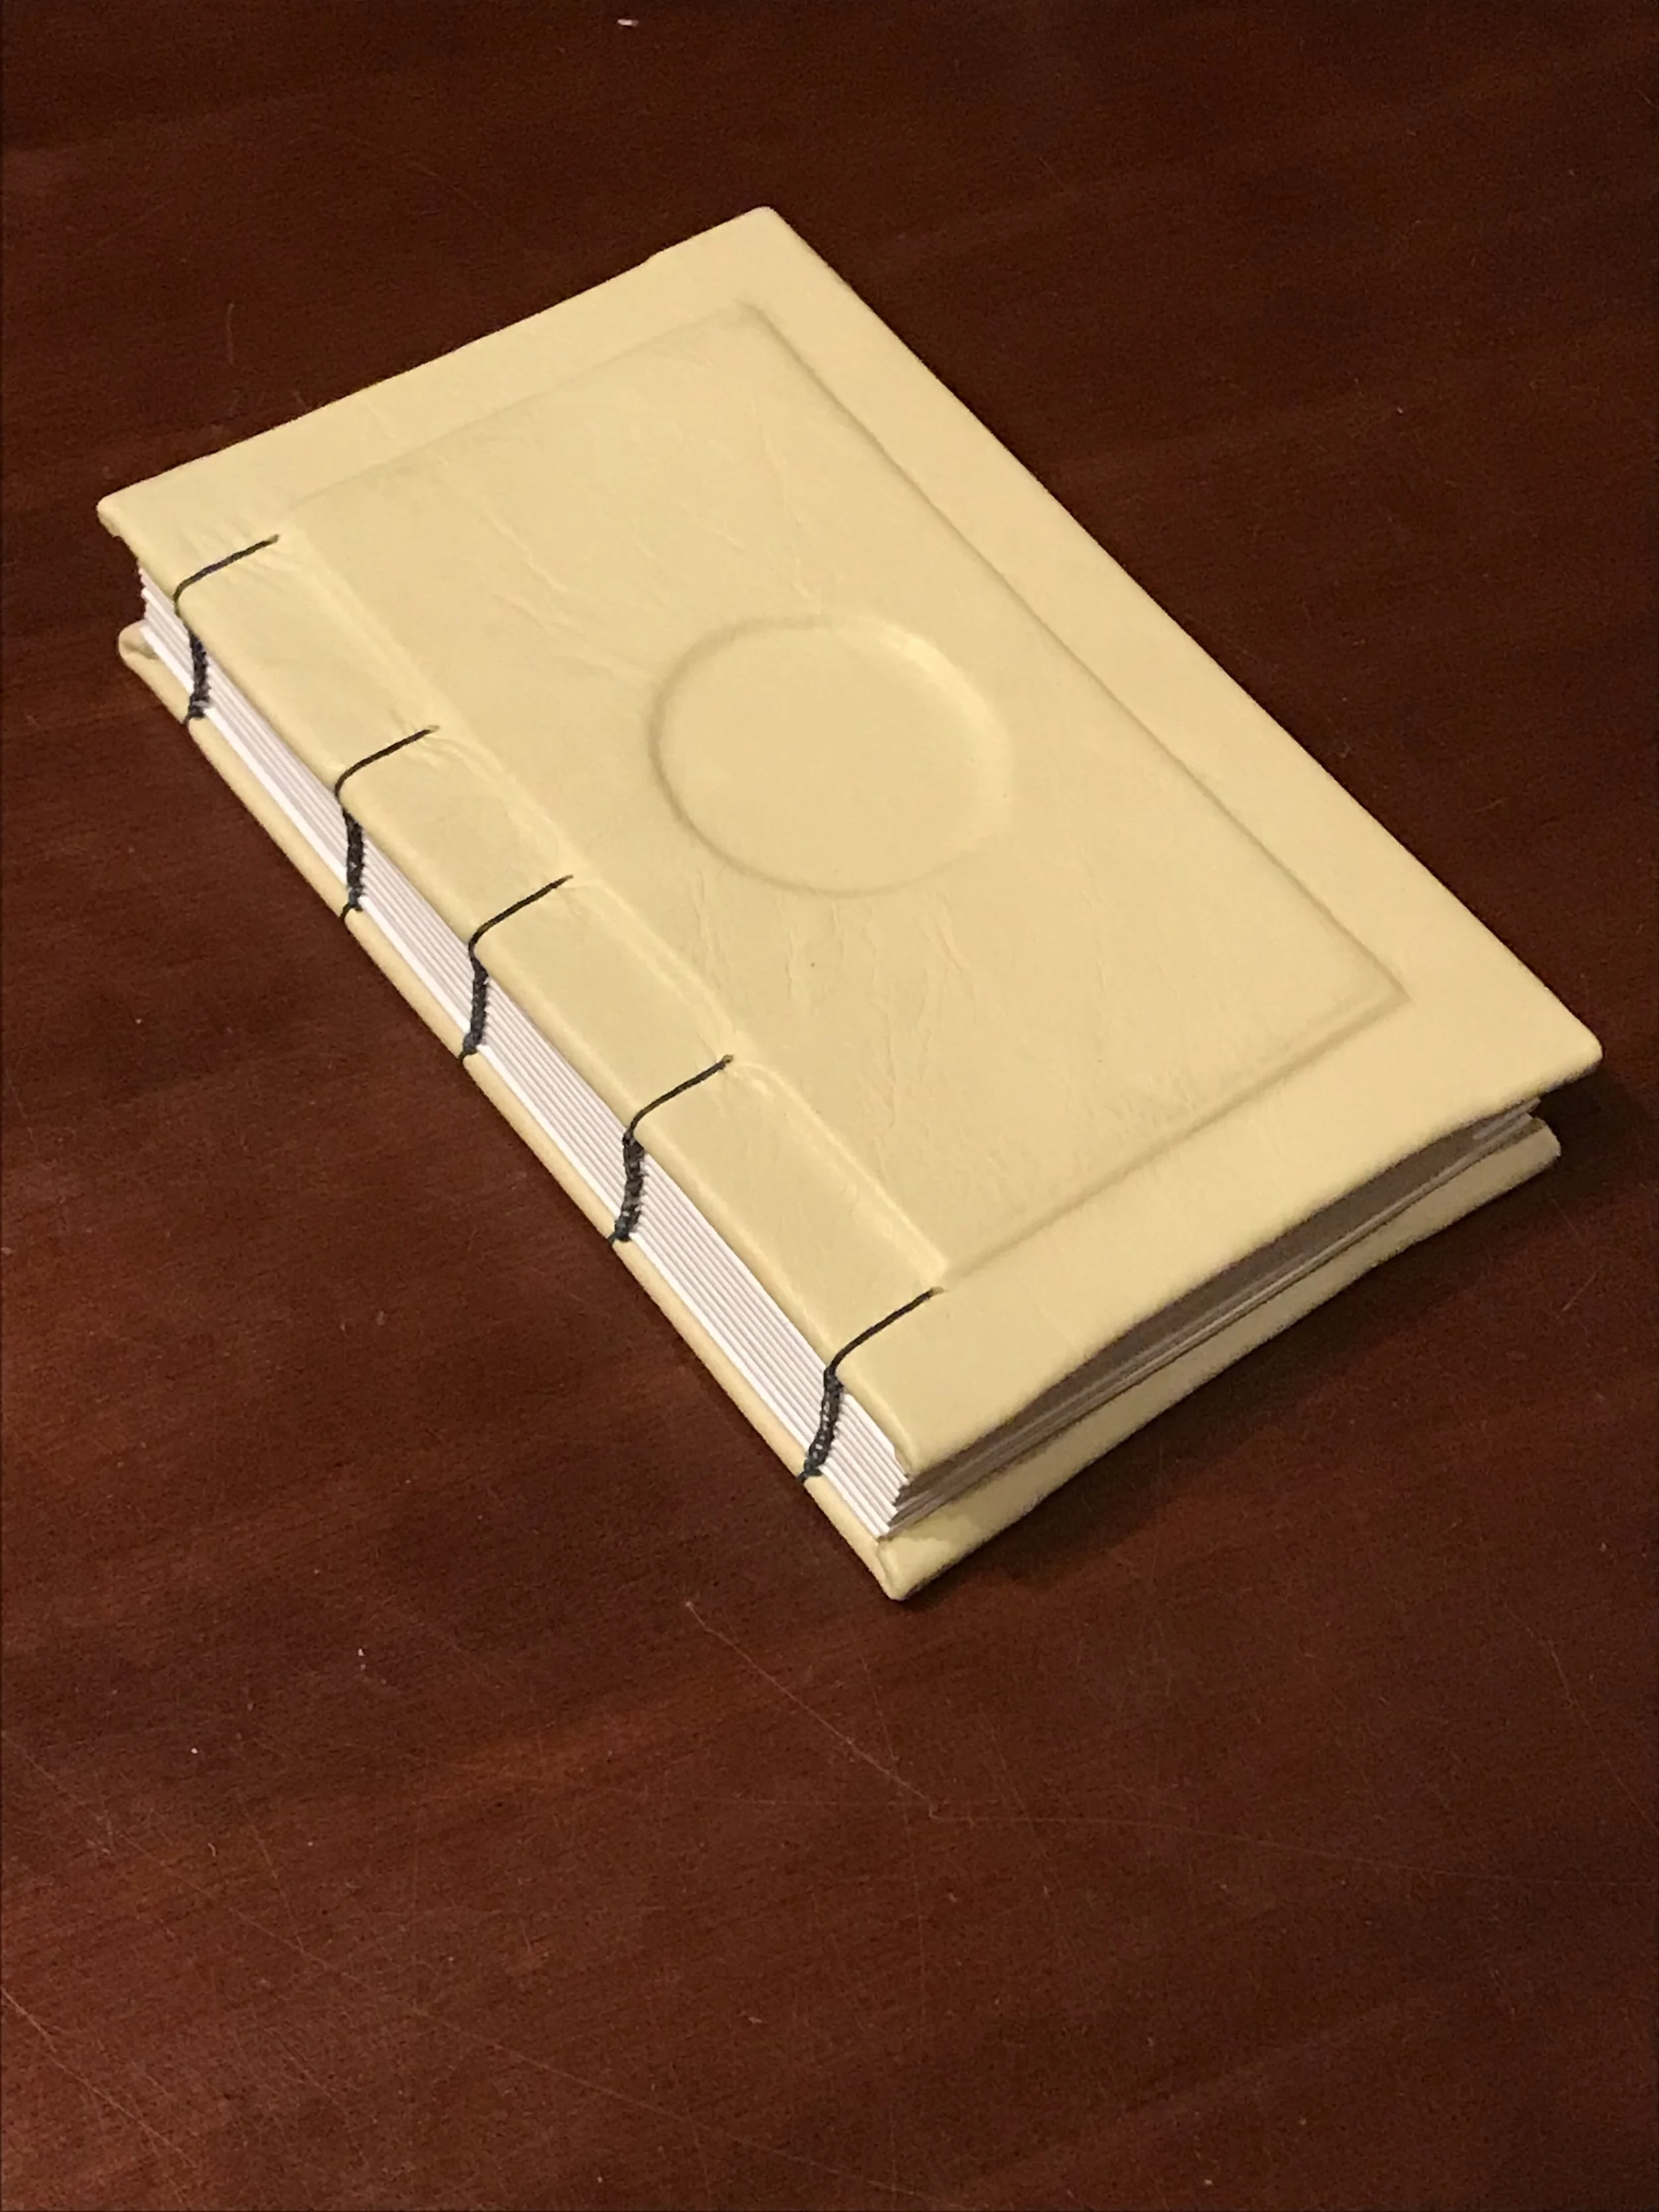
For my embossing, I generally use a book board. I cut it to the desired shape, glue it onto the cover of the book, and then when the cover material is added (usually leather) I tool it into the embossing as the glue dries. For my debossing, I usually use a hot stamp or leather tools to create words or designs in leather.
-
Traditional gilding is done with gold leaf, egg, and hot brass tools. While I’ve dabbled in this, it really is an art in and of itself. The gilding I offer is what is most common for modern commercial bindings. Most commonly referred to as hot-foil stamping, it uses a shiny foil that, when heated, transfers and adheres to a surface. There are machines for adding text as well as other tools for adding images and lines.
-
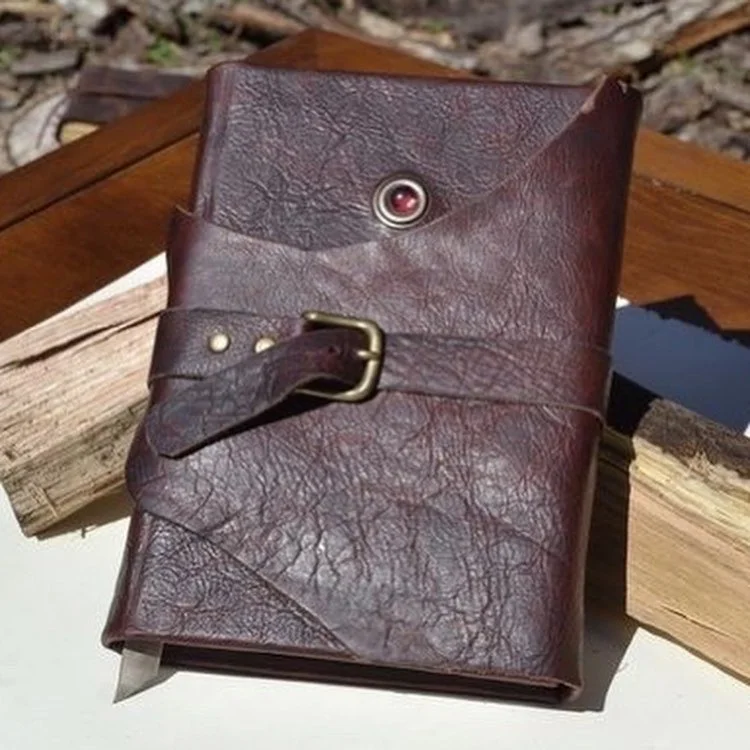
Sometimes folks want to be able to secure a book once it's closed. Closures can range from latches, to buckles, to buttons, snaps, or even just a strip of leather to wrap around the book. Each one can be attached a number of ways depending on what is desired.
-
Inlay is when a portion of the cover material is removed and something else is put there in its place. This can be done with other colors of leather or decorative paper, but I usually do it with gemstones!


I learned tannic iron eco printing at a small skills gathering in 2022. It was primarily being done on fabric, but the teacher also encouraged us to try it on paper. I went home and immediately started experimenting. Because each plant is different the prints can vary widely. But after years of tweaking and experimenting, I’ve found a reliable way to get some gorgeous prints.


The steaming and pressing also embossed the vein structure onto the paper. After they’re ready I take them out of the press, peel off the leaves, and lay them out to dry.


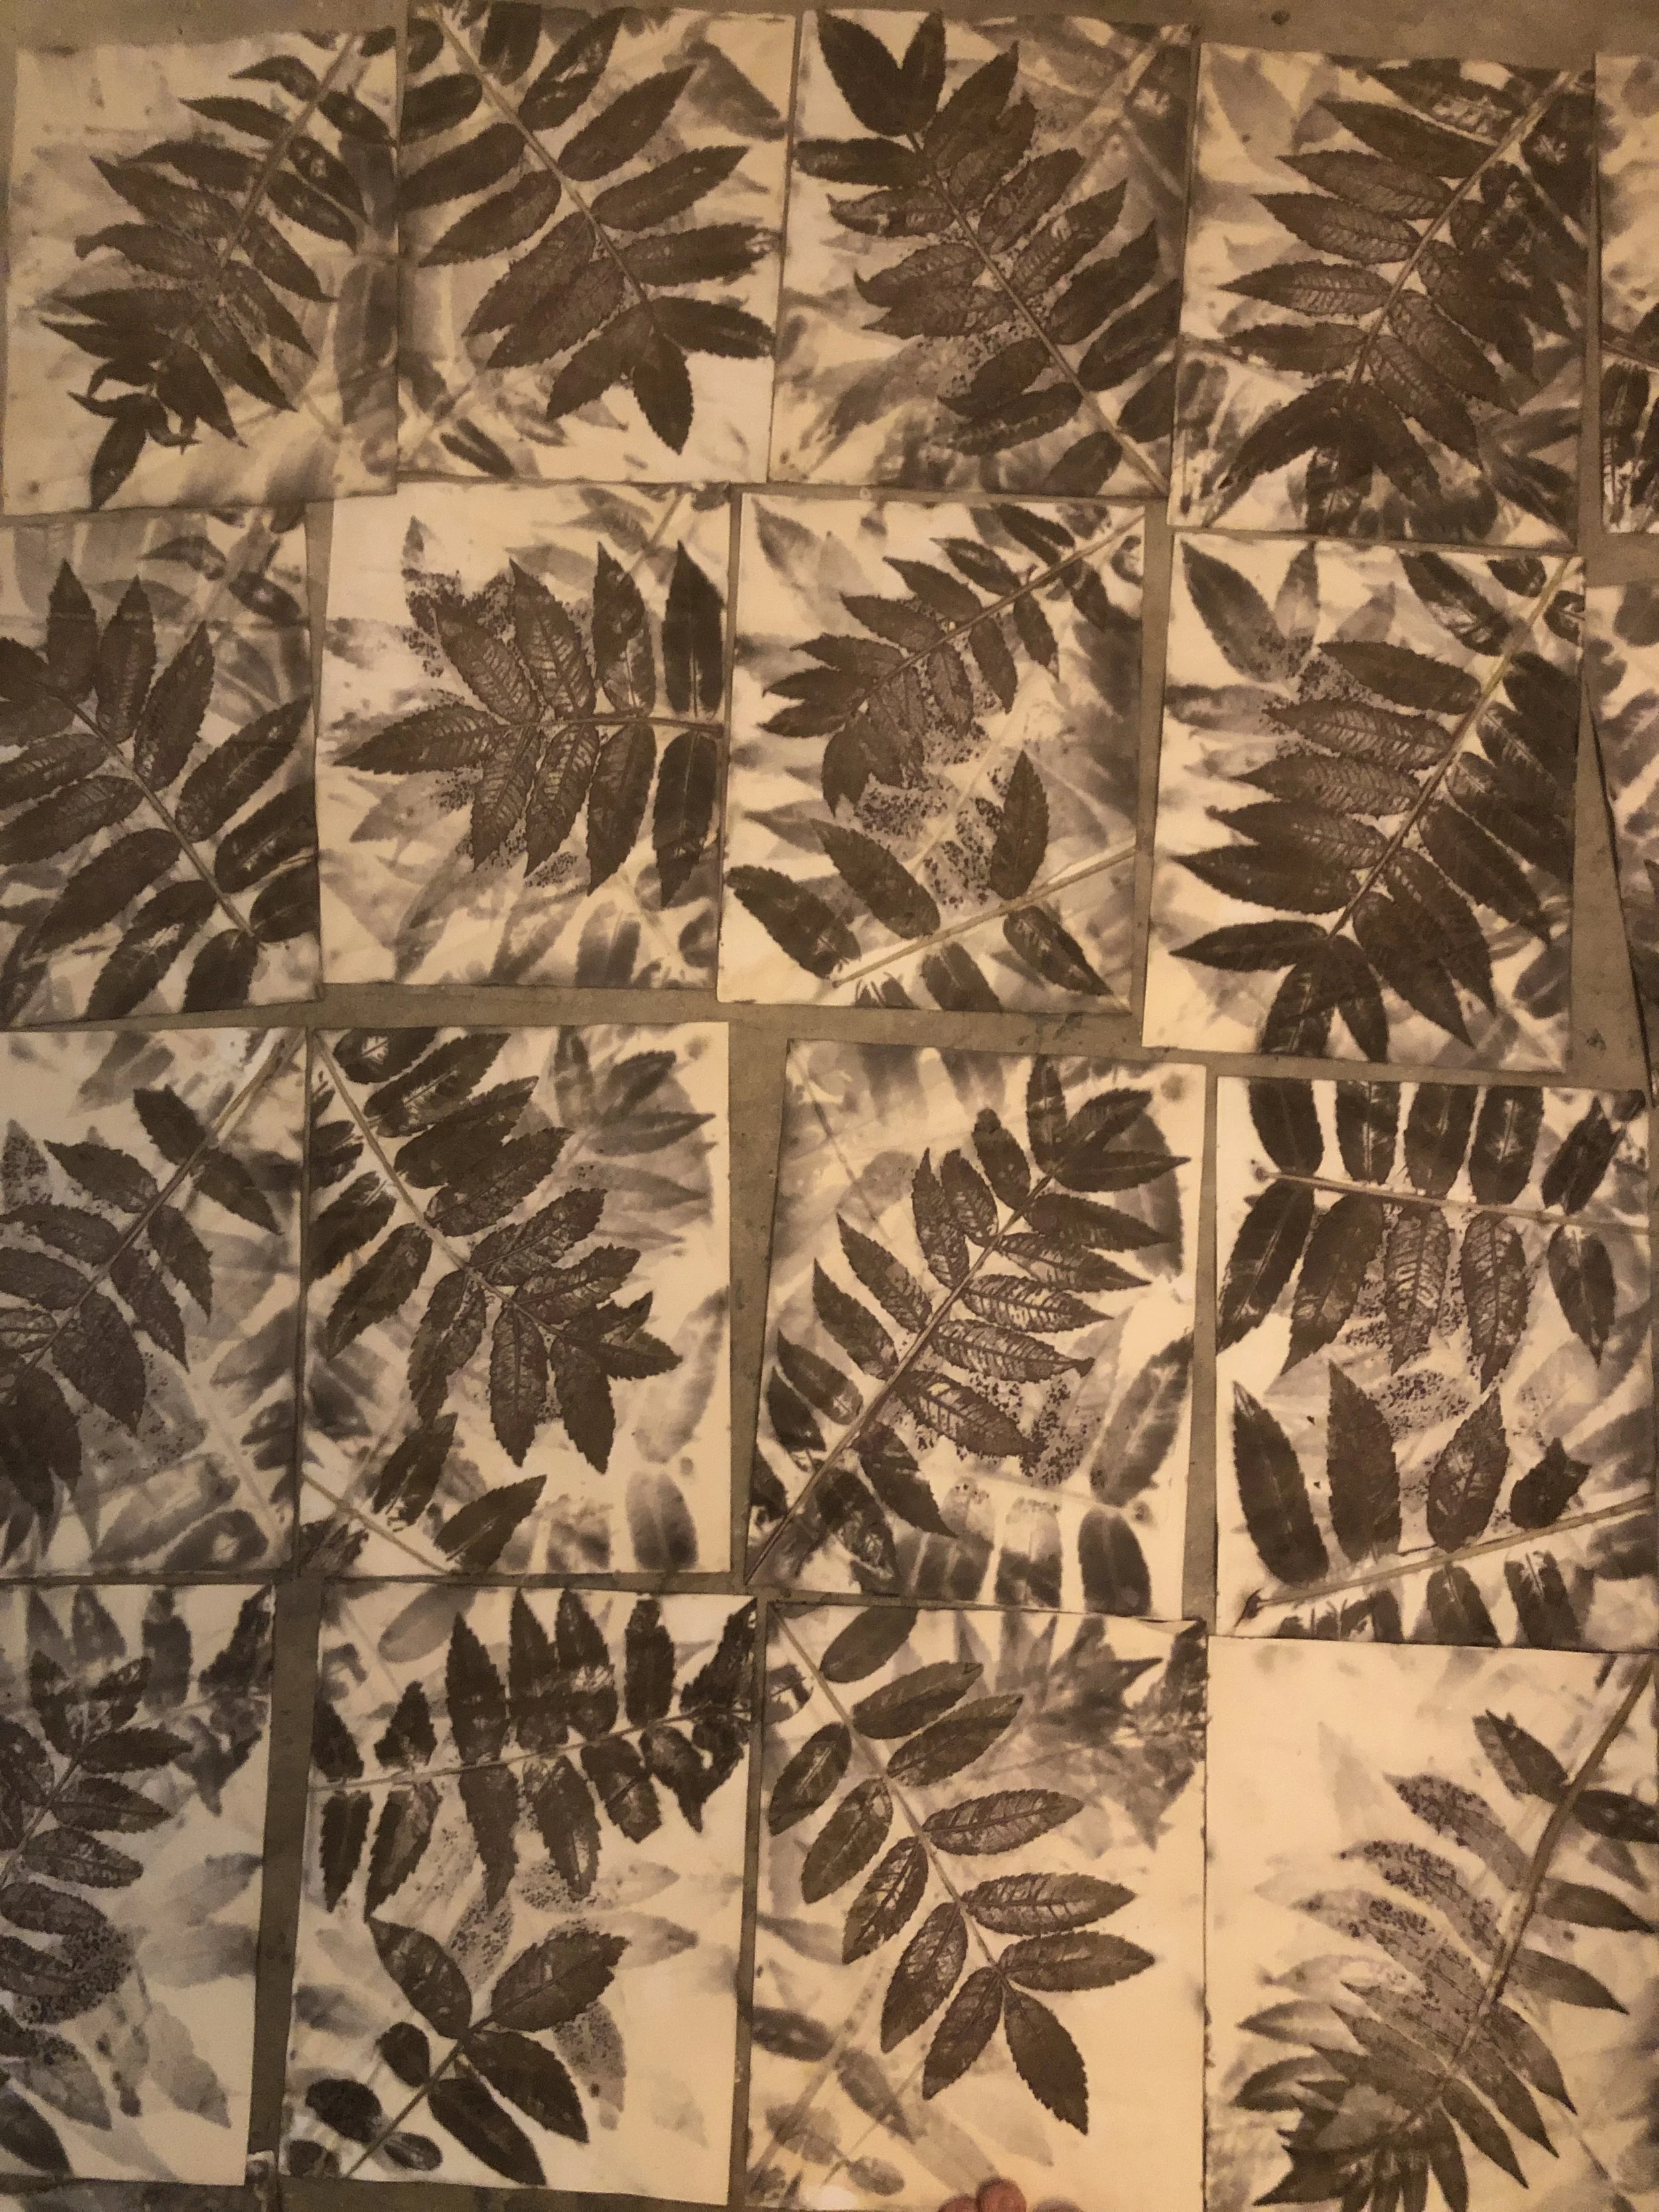
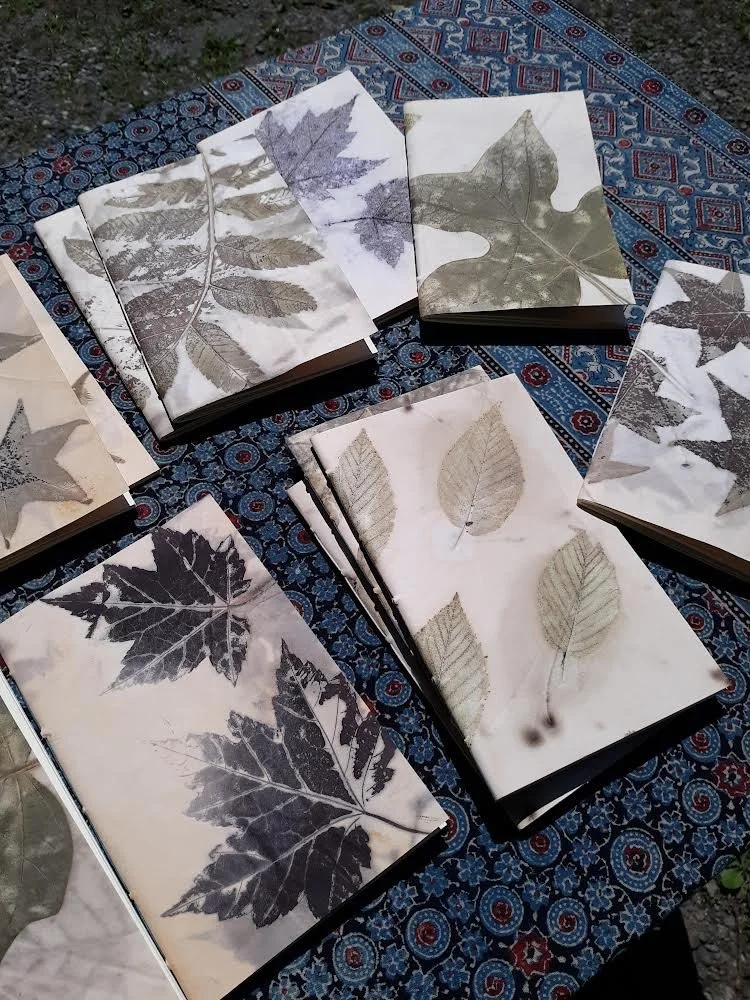


I start by treating the paper with a mordant solution of vinegar and iron. Then I stack layers of paper and leaves in a flower press. I take the press and steam it while it’s pressing. This can take anywhere from 30 minutes to 4 hours depending on the type of leaf, and time of year. Some plants are more rich in tannins than others, and others more readily release their tannins. The time of year and life span of a leaf matters as well, as the amount of tannins in a young leaf differ from an old leaf.
Bindings
-
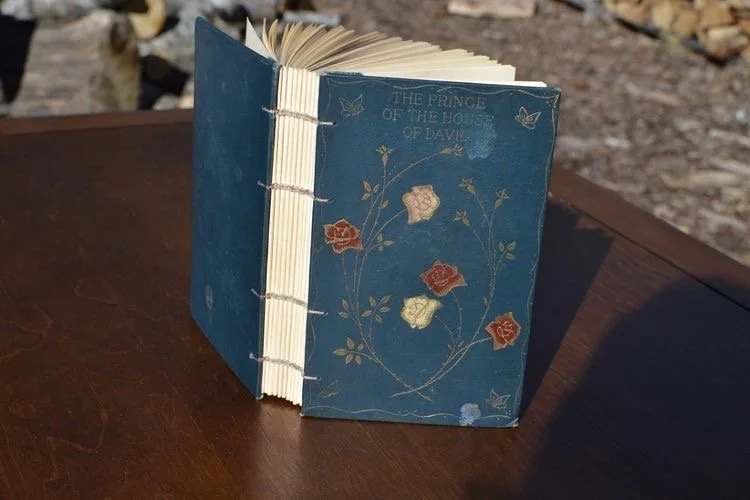
The long stitch binding is one of the most simple types of binding. Long stitch books are when the paper is sewn directly through the cover material. The name refers to the stitching which is visible from the outside. There are lots of different stitching patterns that can be achieved through longstitch! The traditional clever material is leather but you can make a long stitch book with all sorts of fabrics and paper too!
-
Think of a modern hard cover book and odds are you’re thinking of a cased in binding. First the pages are sewn and glued together, then a “case” is made, consisting of the front cover, spine and back cover. Then the pages are “cased in” (glued into the case). The case is usually made from a book board covered with fabric, leather, and or decorative paper. Most of my hard covers books are cased in.
-
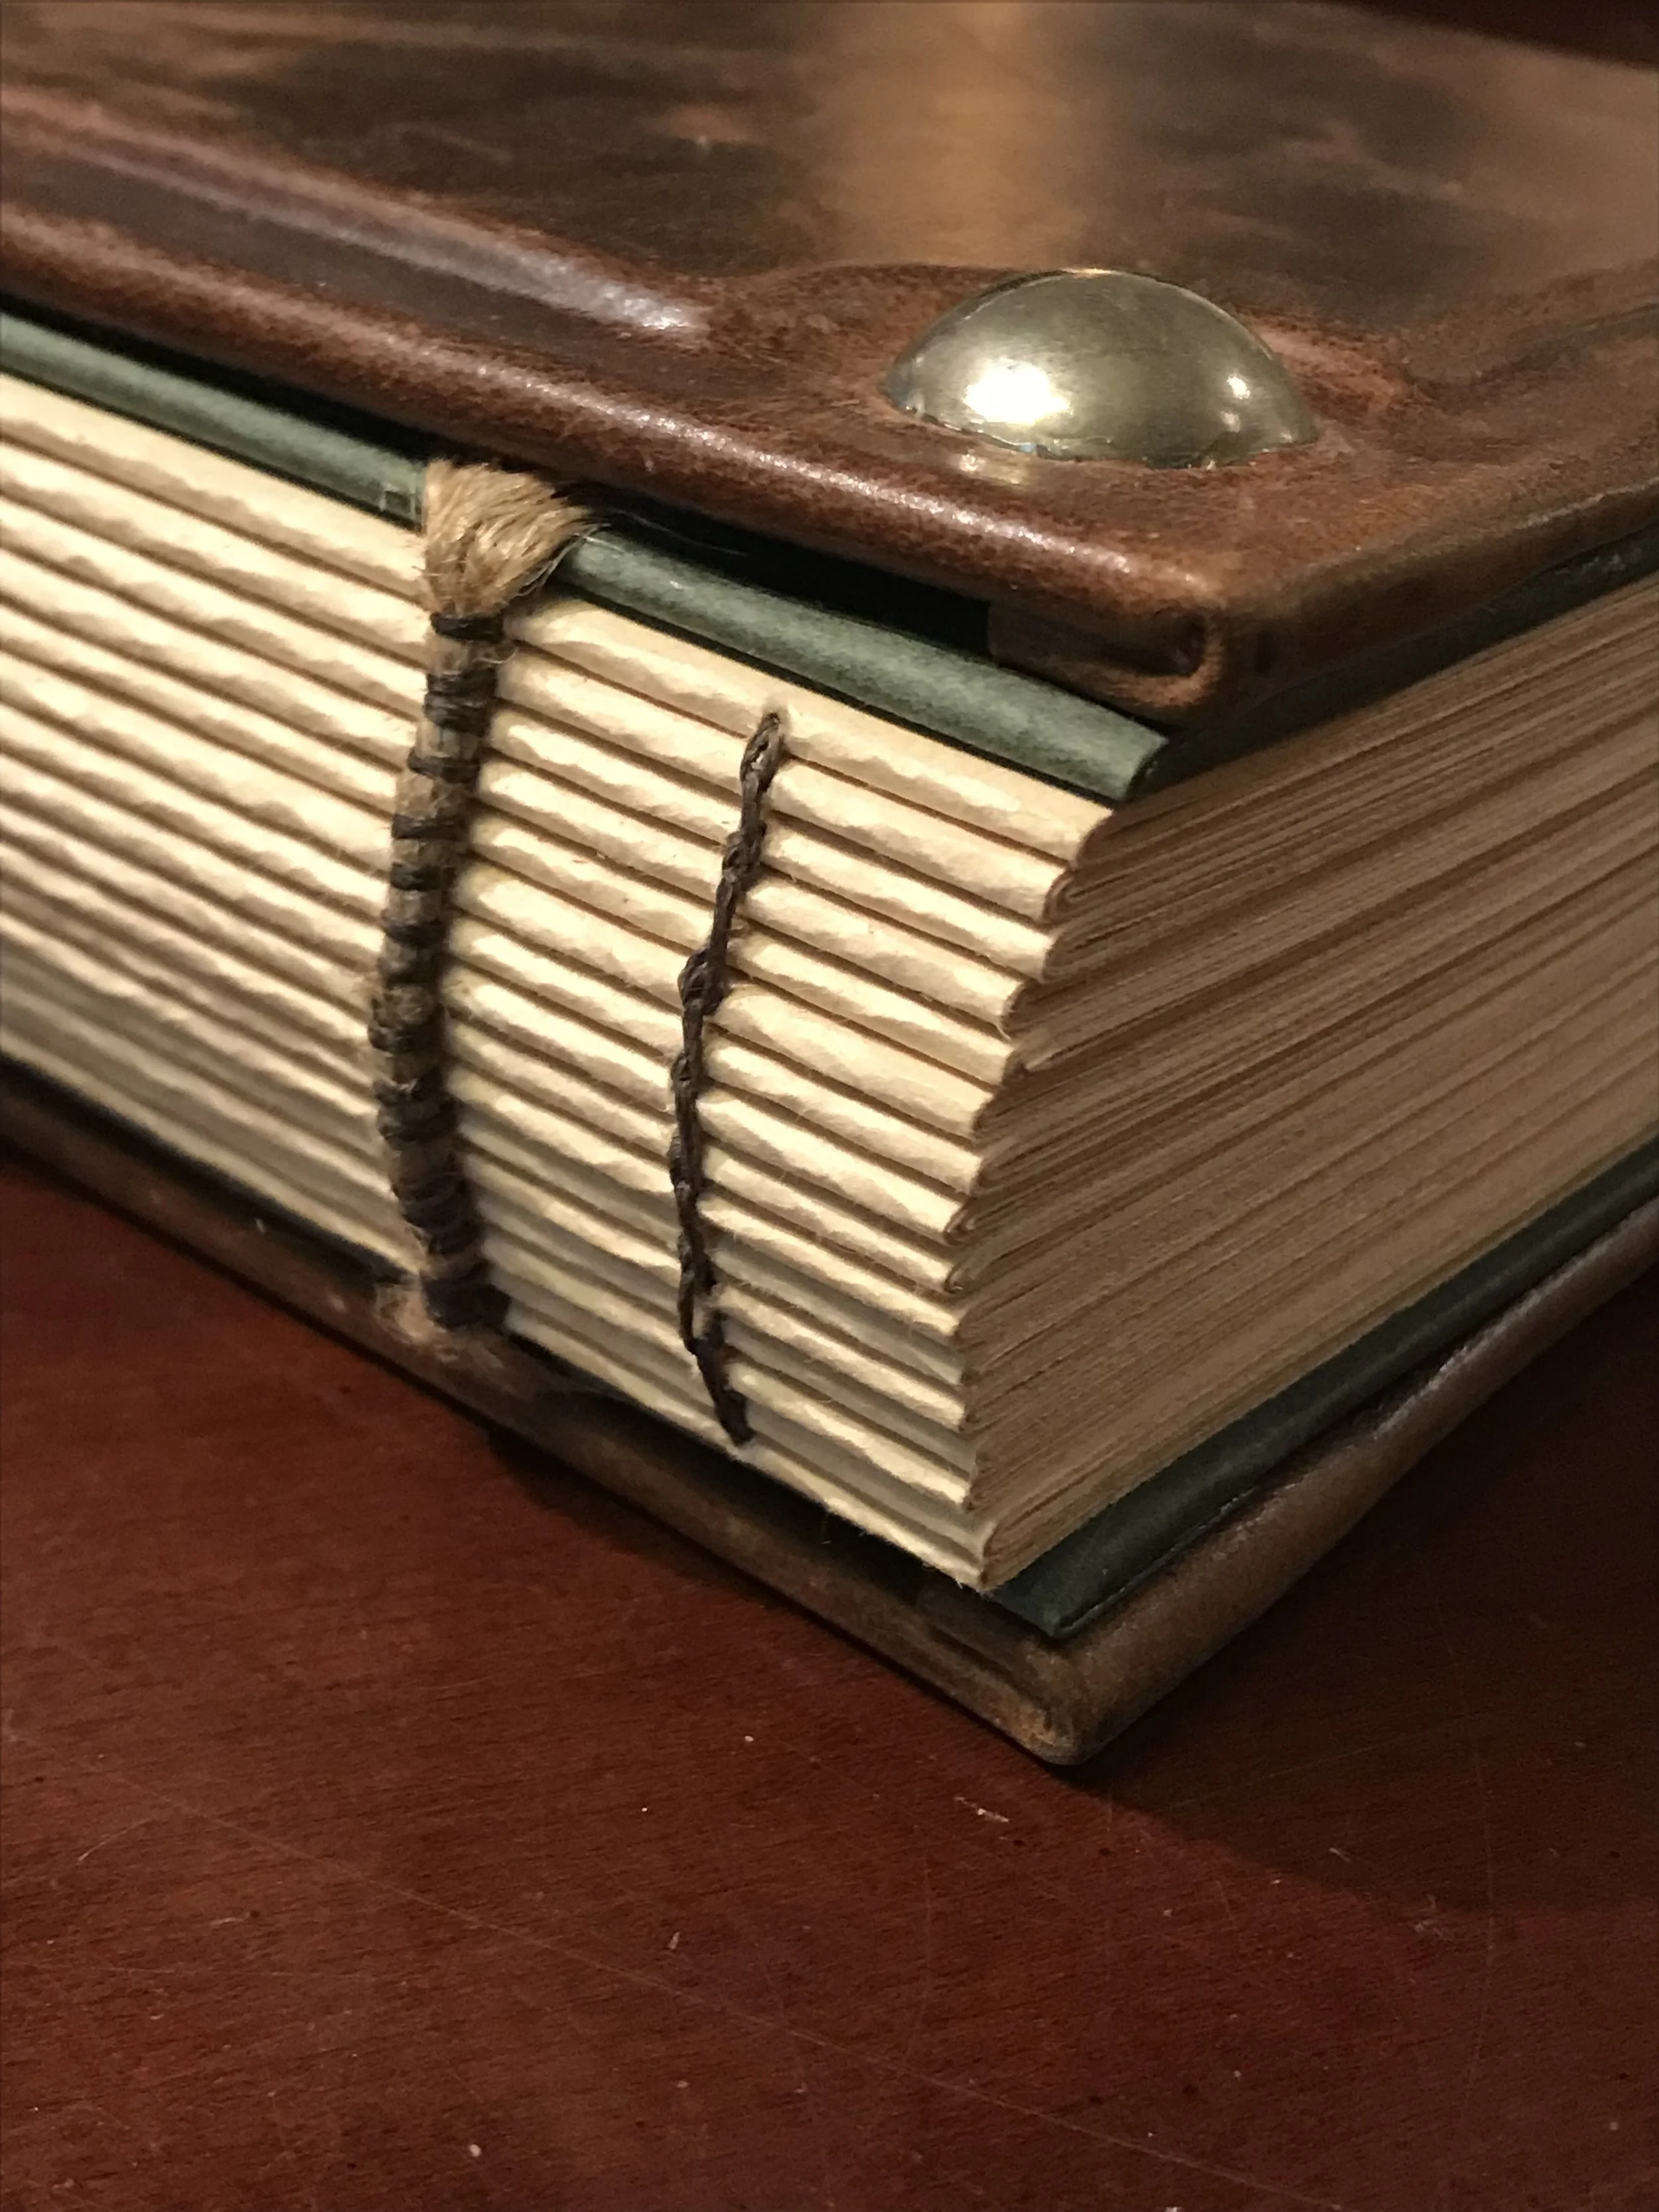
Copitc Stitch is one of the oldest forms of binding dating back almost two thousand years. The name refers to the Egyption christian monks who popularized the binding. The paper and covers are held together with thread resulting in an exposed spine. Coptic stitch is great because you can use just about anything for the covers! I have an ongoing collaboration with a local ceramic artist Donna Griffin who makes clay tablet covers and I bind them into books. Imagination is the only restraint with this binding, I’ve seen people use cassette tapes, sea shells, blocks of wood, even legos as covers!
-
Although those are the three main bindings I use. I also dabble in others both historical and experimental. A lot of the bindings will incorporate elements from historical bindings that I then modernize or add an artistic flair to. Most of them don’t have formal names as they’re experimental.